Introduction
Cutout photo editing is a game-changer for photographers. It’s the magic behind flawless product photos, captivating advertisements, and creative masterpieces. But mastering this art requires more than just knowing how to use a few tools—it’s about understanding the techniques and secrets that can elevate your work to the next level.
Understanding Cutout Photo Editing
What is Cutout Photo Editing?
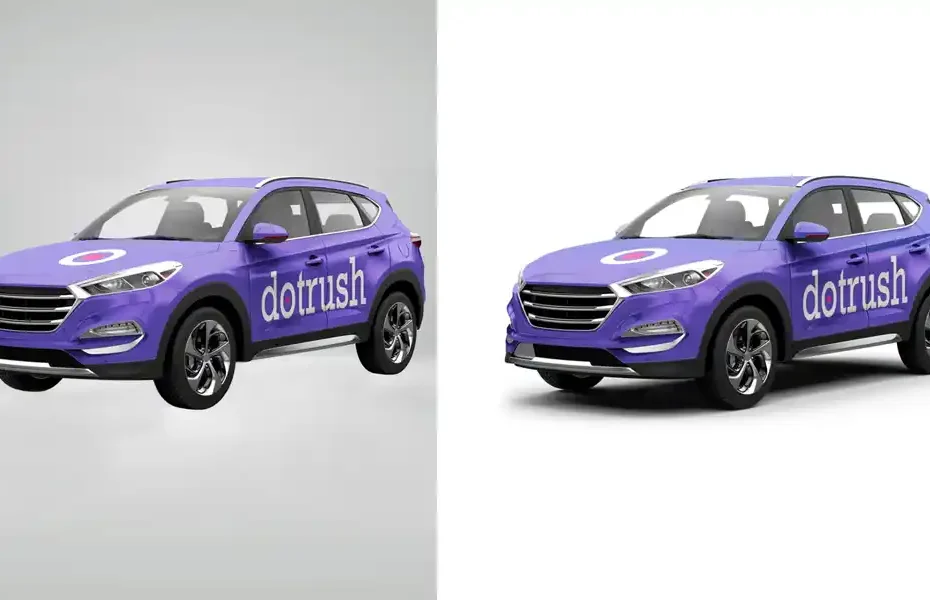
Cutout photo editing involves isolating a subject from its background. This process allows you to place the subject in a new environment or background, giving you creative control over the final image. Whether it’s a model, product, or object, cutout photo editing makes it possible to create stunning visuals.
Why is it Essential for Photographers?
For photographers, cutout editing is essential because it enhances the versatility and impact of their images. It enables them to adapt photos to different contexts, such as marketing materials, websites, and social media. Moreover, it helps in correcting imperfections and achieving a polished, professional look.
Essential Tools for Cutout Photo Editing
Software Options
When it comes to software, Adobe Photoshop reigns supreme. Its powerful tools like the Pen Tool, Quick Selection Tool, and Layer Masks make it a favorite among professionals. Other great options include GIMP, Affinity Photo, and CorelDRAW, each offering unique features that cater to different needs and budgets.
Hardware Recommendations
A high-resolution monitor and a graphic tablet can significantly enhance your editing precision. Monitors with accurate color reproduction ensure your edits look great across different devices. Tablets, on the other hand, offer better control, especially when dealing with intricate details like hair and fur.
Preparing Your Image for Editing
Image Quality and Resolution
Always start with high-quality images. The higher the resolution, the more details you can preserve during the editing process. This becomes crucial when working on professional projects where every detail matters.
Initial Adjustments
Before diving into cutout work, make initial adjustments to your image. Adjust the brightness, contrast, and saturation to ensure the subject stands out. This step simplifies the cutout process and sets a solid foundation for further editing.
Basic Cutout Techniques
Using the Lasso Tool
The Lasso Tool is perfect for quick and rough selections. It’s best used for subjects with simple, well-defined edges. Practice steady hand movements to improve your accuracy and speed.
Quick Selection Tool Tips
The Quick Selection Tool is intuitive and easy to use. It automatically detects edges as you drag the brush over the subject. Use the tool’s options to refine the selection and ensure no areas are missed.
Advanced Cutout Techniques
Pen Tool Precision
The Pen Tool is the go-to for precise cutouts. It allows you to create paths and convert them into selections. This tool requires practice but offers unmatched accuracy, making it ideal for complex subjects.
Masking Techniques
Layer Masks are powerful for non-destructive editing. They let you hide or reveal parts of a layer, giving you flexibility and control. Combine masks with selection tools for even better results.
Refining the Edges
Feathering and Smoothing
Feathering softens the edges of your cutout, creating a more natural transition. Smoothing can eliminate jagged lines, making your selection look more polished. Use these techniques judiciously to maintain a realistic look.
Hair and Fur Detailing
Cutting out hair and fur can be challenging. Use the Refine Edge tool in Photoshop to handle these delicate details. This tool helps you capture fine strands and achieve a seamless cutout.
Dealing with Complex Backgrounds
Handling Busy Scenes
Busy backgrounds can complicate cutout editing. Use the Select and Mask feature to isolate the subject while ignoring the background. This tool provides various options to refine the selection and remove unwanted elements.
Blending Techniques
When integrating the subject into a new background, blending techniques are crucial. Adjust the color, lighting, and shadows to match the new environment. This step ensures your cutout looks natural and convincing.
Creating Realistic Shadows and Highlights
Shadow Creation
Shadows add depth and realism to your cutouts. Use the Drop Shadow effect or manually paint shadows on a new layer. Pay attention to the light source and angle to create accurate shadows.
Highlight Adjustments
Highlights enhance the three-dimensional look of your subject. Use the Dodge Tool or adjustment layers to add highlights where the light naturally hits. This technique brings your cutout to life.
Incorporating Cutouts into New Backgrounds
Background Selection
Choose a background that complements your subject. Consider the colors, textures, and lighting to ensure a harmonious blend. The right background can enhance the overall impact of your image.
Seamless Integration
Integrate your cutout seamlessly by matching the lighting and perspective. Use the Transform Tool to adjust the size and position of the subject. Fine-tune the shadows and highlights for a cohesive look.
Adding Depth and Dimension
Using Layers
Layers are essential for adding depth and complexity to your edits. Use multiple layers to separate different elements and apply adjustments individually. This technique offers greater flexibility and control.
Applying Filters
Filters can enhance the mood and style of your image. Experiment with different filters to add textures, colors, and effects. Just remember to keep it subtle to avoid overpowering the main subject.
Common Mistakes and How to Avoid Them
Overdoing Effects
Less is more when it comes to photo editing. Avoid overdoing effects like shadows, highlights, and filters. Strive for a natural look that enhances the subject without drawing attention to the edits.
Ignoring Light Sources
Always consider the light source when making adjustments. Incorrect lighting can make your cutout look unrealistic. Match the light direction and intensity to the new background for a seamless blend.
Tips for Speeding Up Your Workflow
Keyboard Shortcuts
Mastering keyboard shortcuts can significantly speed up your workflow. Shortcuts for common tools and actions save time and improve efficiency. Customize your shortcuts for a more personalized editing experience.
Batch Processing
Batch processing allows you to apply the same edits to multiple images at once. This technique is especially useful for projects with a large number of similar photos. Use actions and scripts to automate repetitive tasks.
Practical Applications of Cutout Photo Editing
Commercial Photography
Cutout editing is invaluable in commercial photography. It enables you to create clean, professional images for products, advertisements, and marketing materials. High-quality cutouts can enhance brand appeal and drive sales.
Creative Projects
For creative projects, cutout editing opens up endless possibilities. It allows you to experiment with different backgrounds, effects, and compositions. Use cutouts to create unique, eye-catching visuals that stand out.
Conclusion
Cutout photo editing is a powerful skill that can transform your photography. By mastering these techniques and secrets, you can create stunning images that captivate and impress. Practice regularly, experiment with different tools, and continually refine your skills to become a cutout editing pro.
FAQs
What is the best software for cutout photo editing?
Adobe Photoshop is the top choice for cutout photo editing due to its advanced tools and features. Other good options include GIMP, Affinity Photo, and CorelDRAW.
How can I improve my cutout edges?
To improve your cutout edges, use tools like the Pen Tool and Refine Edge. Feathering and smoothing techniques can also help create more natural transitions.
Are there any shortcuts for faster editing?
Yes, mastering keyboard shortcuts and using batch processing can significantly speed up your editing workflow. Customize your shortcuts for even greater efficiency.
How do I make my cutouts look more realistic?
To make your cutouts look more realistic, pay attention to lighting, shadows, and highlights. Match these elements with the new background to create a seamless blend.
Can cutout photo editing be done on mobile devices?
Yes, several mobile apps like Adobe Photoshop Express and Affinity Photo offer cutout editing features. However, desktop software provides more advanced tools and greater precision.